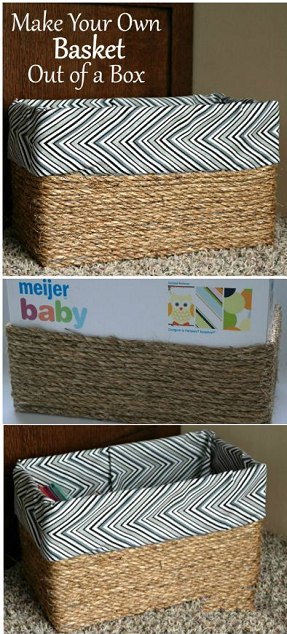
Basket out of a box
 Do it yourself
Supplies
- 1 sturdy box
- roll of twine or rope
- glue gun and hot glue sticks
- fabric
Instructions
Begin by cutting the top flaps off of your box if it has them.
Use hot glue to attach one end of the rope or twine to your box. I used rope rather than twine for a heavier look. The thicker your rope or twine the less it will take. I used about 50′ of rope to cover 2/3 of my box (approximately 7″w 13″ l x 9″h).
Begin wrapping the rope around the box using hot glue to secure it every few inches. The rope does not need to be fully glued down but gluing every few inches will keep the rope in place and the wrap nice and tight.
Continue wrapping and securing the rope until you’ve covered 2/3 of the box.
Cut a strip of fabric long enough to go around your box The strip should be twice as wide as the exposed area above the rope + 1″. In my case my exposed area is about 3″ so my fabric strip was 6 1/2″ wide.
Add a bead of hot glue along the top of the rope, working one side to a time. Fold over one edge of the fabric 1/2″ and press it against the hot glue. The right side of the fabric will be against the box so that when it is folded up later the right side will be exposed. Use a knife or boning tool to tuck the fabric tight against the rope. Repeat with all sides of the box.
When the fabric has been attached to the box all the way around fold it up and into the inside of the box. Use additional glue to secure the fabric to the inside of the box.
You could fully line the box if you wanted depending on what you plan to use your new basket for. I plan to use my basket on higher shelves where the inside will not be seen. This is a super easy, no sew way to create the look of a lined basket without the extra work! It took me about 45 minutes to make this basket and less than $5 in supplies!
See how easy it is to make your own basket? You can totally do it too!
Source:livingwellmom.com


